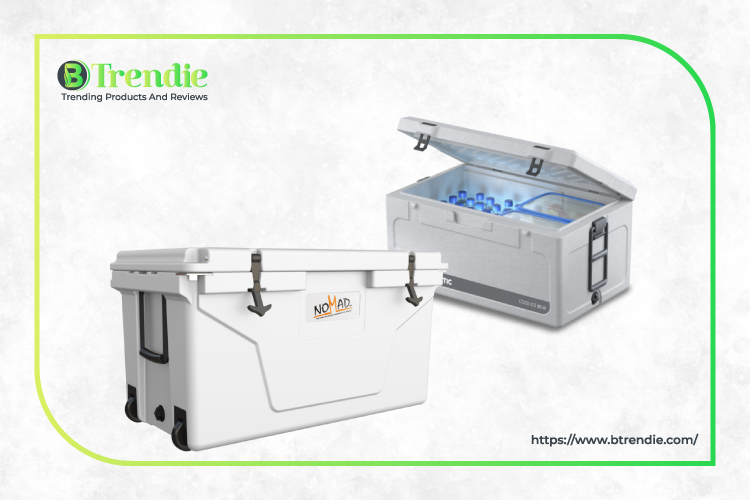
Is the grocery store an hour away from home? Do you need to transport food on road trips or camping? Are you going to cookouts and want to keep ingredients fresh? Or do you want to store food while on the boat or at the beach? If you answered “yes” to any of these, chances are you need an icebox or a cooler.
Well, the summer has just gotten more scorched than ever. If you want to store food in the icebox or cooler, then that’s a smart move to keep everyone safe from food poisoning as well. Chill now! There are simple tips and tricks for using the good old icebox for food storage, no fans are required.
Why Use a Cooler for Food Storage
Bacteria and food contaminants grow and reproduce rapidly between 40°F and 140°F Fahrenheit. But particularly, when it is above 90°F, even cold food can heat up to reach those temperatures faster than you think it could. These iceboxes or coolers are your best friend to keep summer and outdoor activities fun (and safe!). However, you need to pack them correctly so that food can remain at most 40°F to keep them from spoiling, which otherwise can make you sick.
How to Use an Icebox or Cooler for Food Storage
1. Get everything you need ready. What are the menus for this trip or outdoor adventure? How much of each ingredient do you need for the recipes? Prepare for every meal ahead.
For convenience, you may also want to prepare the vegetables in advance, pack up small containers for condiments, marinate meat, and do not forget the salt. Make sure that each is packaged in a resealable plastic container because the food might get wet inside the cooler.
2. Keeping food cold Whether it is hot or cold, an icebox is designed and built to keep the proper food temperature. If you’re storing the cooler in a hot area of your homes such as the attic or garage, open it up a day before packing it because you want to get it cold. As a tip, you may want to have a bag of ice in the empty cooler so that it chills a couple of hours before packing.
3. Fill the icebox to the brim! Doing so will preserve the ice longer than filling it partially. The prior leaves no room for air to melt the ice.
4. When packing, you must start with an ice layer at the bottom of the icebox or cooler. This step is important to keep the food cold while in the cooler. Add the items, which you want to chill first after the layer of ice. These food items include meat, which must stay the coolest. Add one more layer of ice and then another of food. Tip: finish packing the foods that do not need much refrigeration such as vegetables. Now if you don’t have another icebox for drinks, pack them on top because they’re least likely (and even impossible to go bad). Drinks are also the first ones you’ll go digging into upon getting to your outdoor camp.
5. Use block ice because they melt longer than crushed ice, as less air will be able to enter the solid ice. Crushed ice won’t do well because there is not much solid ice, and it’s full of space. Remember air is the worst enemy of ice, so crushed ice that melts quickly due to air is the worst choice for packing. Block ice can also keep the cooler cold. Survivalist tip: if you don’t have block ice, make use of juice bottles or ice cream containers and make ice.
Remember not to fill them totally to give way for expansion later. Before making ice, add salt to the water. Salt can lower its freezing temperature of it. That said the ice would be colder. Rather than adding salt to the water, seawater can also be a good choice for making ice if you’re living near the sea.
6. Aside from not opening the cooler frequently, you should also keep it out of the sun. Air and sunlight are its two biggest foes. When you get to your destination, keep the icebox under the shade, and make sure of good airflow inside it. Do not leave the cooler in the tent or inside your car because the temperature inside these areas can be really high. For best results, cover your cooler with a towel or blanket aside from putting it in a shady spot. If you’re at the beach, bury the cooler in the sand before shading it with an umbrella.
7. If you have many iceboxes, you will do better. For example, if you’re having a cookout and feeding more guests, then using separate coolers for drinks and food would do well for packing. The cooler for the drinks will be opened more frequently.
8. Chill the foods you’re packing, and say overnight. The colder they are, the better the cooler will do its job of keeping them chilled. Plus, the longer time they will remain cold. How does that sound? That said, you should not pack warm beers or sodas, as doing so will heat up all the other foods and even melt the ice fast. The night before, chill all the foods you’d keep in the icebox or cooler. For water, you must freeze it before packing.
9. For a weekend trip, you can combine ice cubes and blocks. Ice cubes will chill food faster, and blocks will make it cool longer. To keep the ice cubes frozen for a longer time, you can also make use of reusable cooler packs, whose freezing temperature can be lower than that of water.
10. Pack and take two iceboxes for long trips. One can be for snacks and lunch, while the other for foods you need later in the vacation.
Summing Up
Storing food in the icebox or cooler is easier than you think it is. Follow the tips above, and keep food and drinks chilled longer. Finally, you don’t only keep their proper temperature but also avoid food poisoning. That means ultimate fun and 100% safety during cookout, camping, or vacation!


